How to Turn a Script and Voiceover Into a Faceless YouTube Video
A script is not a video.
A voiceover is not a video.
Even a good script and a clean voiceover are still only the middle of the workflow.
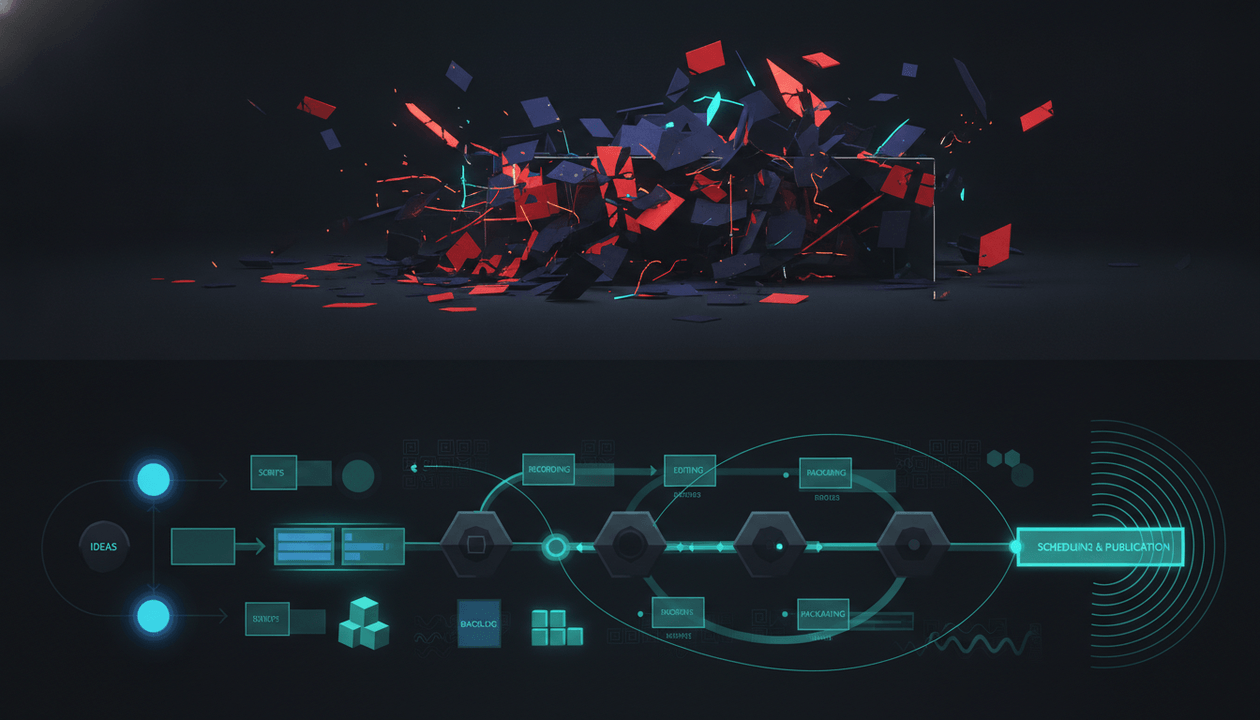
Most faceless YouTube creators fail at the handoff.
They write a script.
They generate a voiceover.
Then they throw both into an AI video generator, stock footage editor, or timeline and hope the video comes out watchable.
It usually does not.
The pacing feels random.
The visuals do not match the words.
The scenes look generic.
The captions feel disconnected.
The music does not support the emotion.
The thumbnail promises one thing, but the video opens with something else.
The result looks finished, but it does not feel directed.
That is why turning a script and voiceover into a faceless video needs a real production workflow.
Not just a generator.
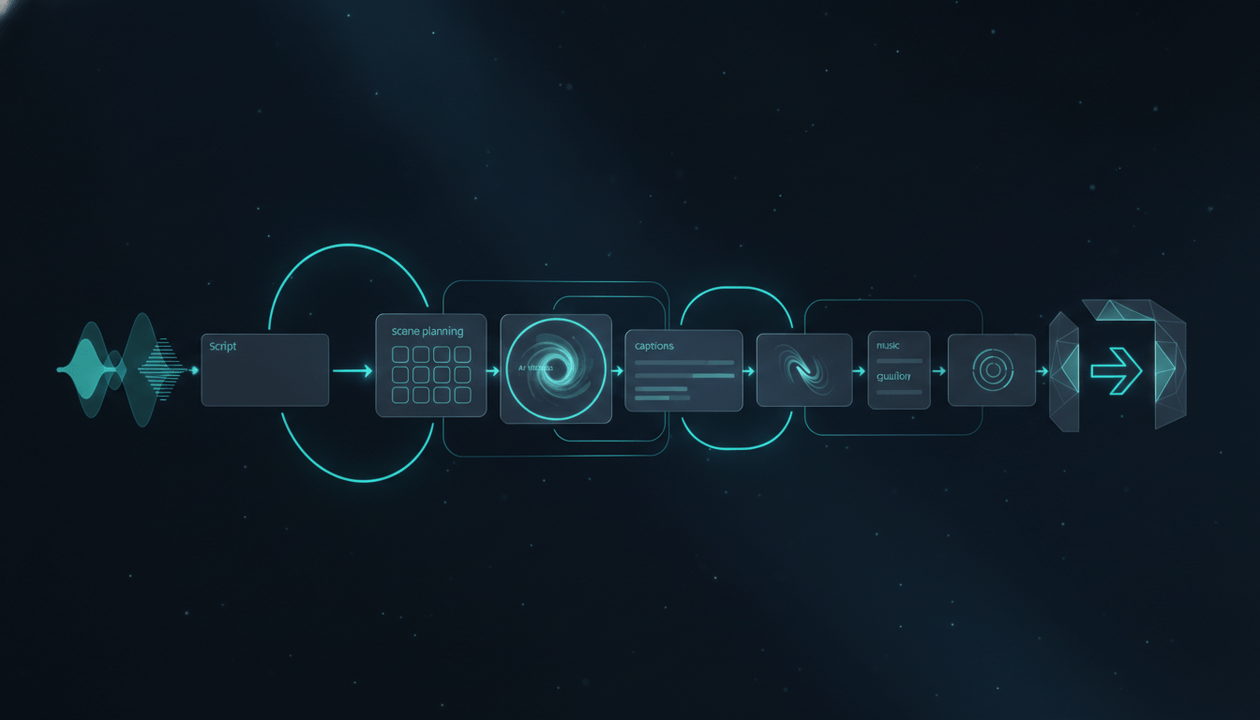
This guide shows you how to go from script and voiceover to a finished faceless YouTube video using a structured process: scene planning, visual direction, pacing, captions, music, motion, editing, quality control, originality checks, and final export.
The goal is not to make a video as fast as possible.
The goal is to turn a validated script into a video people can actually click, watch, and trust.
Key Takeaways
- A script and voiceover are not enough. A faceless video needs scene structure, visual intent, pacing, captions, music, motion, and editing logic.
- The biggest production mistake is generating visuals line by line without understanding the title, thumbnail, hook, and viewer promise.
- A good faceless video production workflow starts with the package: title, thumbnail, hook, script thesis, audience, tone, and visual style.
- YouTube’s monetization policies reward original and authentic content and warn against mass-produced, repetitive, or generic AI content with little original perspective. Source: YouTube Help
- YouTube requires creators to disclose realistic altered or synthetic content in certain cases, especially when it makes a real person appear to say or do something they did not do, alters footage of a real event, or generates a realistic scene that did not occur. Source: YouTube Help
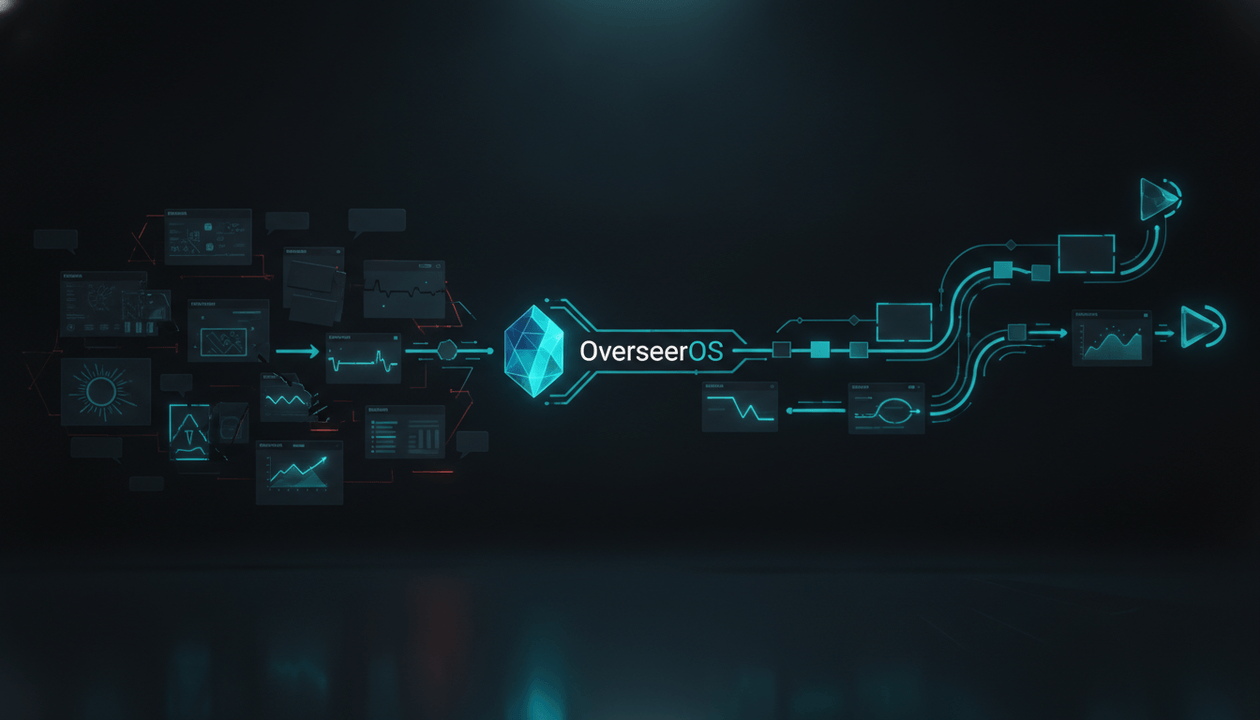
- OverseerOS Auto Edit Studio helps creators turn scripts and voiceovers into structured faceless videos with scene planning, AI visuals, captions, music, motion, style direction, and export workflows.
- The best workflow is research first, packaging second, scripting third, voiceover fourth, production fifth.
The Real Problem: Most Faceless Videos Have No Director
Most failed AI faceless videos do not fail because the tools are weak.
They fail because there is no direction.
A director decides:
- What the viewer should feel
- What each scene should show
- When the pacing should change
- What visual idea supports each section
- Where captions should emphasize key lines
- When music should build or pull back
- When motion should be calm or urgent
- What should be simple
- What should be dramatic
- What should be removed
AI tools can generate scenes.
They cannot automatically know the intention behind every moment unless you give them a workflow.
That is why many AI faceless videos feel like this:
Script sentence → random image → script sentence → random stock clip → script sentence → generic AI scene → script sentence → caption overlay.
That is not editing.
That is assembly.
A strong faceless video feels designed.
The visuals support the argument.
The pacing follows the voiceover.
The captions guide attention.
The music supports the emotional arc.
The opening pays off the title and thumbnail.
The scenes make the script easier to understand.
That is the difference between a generated video and a directed video.
What You Need Before Production Starts
Do not open a video tool yet.
Before turning a script and voiceover into a faceless video, you need six inputs.
| Input | Why It Matters |
|---|---|
| Title | Defines the promise the viewer clicked |
| Thumbnail concept | Defines the visual expectation |
| Hook | Defines the opening emotional contract |
| Script | Defines the argument and structure |
| Voiceover | Defines timing, rhythm, and tone |
| Visual style direction | Defines what the video should look and feel like |
If one of these is missing, production becomes guesswork.
A weak production brief says:
Make a faceless video from this script.
A strong production brief says:
This video argues that AI production speed is useless without research and packaging. The viewer is a faceless YouTube creator getting low views. The visual style should feel like a premium dark creator command center, with scenes showing broken workflows, research dashboards, title-thumbnail packaging, scripts, voiceover, and final video production. The pacing should be urgent in the opening, structured in the framework sections, and clean in the final checklist.
That is a direction.
A video tool can work with that.
A human editor can work with that.
A team can work with that.
The Script-to-Video Workflow
Here is the full workflow.
| Step | Goal | Output |
|---|---|---|
| 1 | Confirm the video promise | Title, thumbnail, hook alignment |
| 2 | Clean the script for production | Scene-ready script |
| 3 | Generate or record the voiceover | Final narration file |
| 4 | Break the script into scenes | Scene map |
| 5 | Assign visual intent to each scene | Visual brief |
| 6 | Choose visual style | Consistent look |
| 7 | Add captions and emphasis | Attention guidance |
| 8 | Add music and sound design | Emotional pacing |
| 9 | Add motion and transitions | Retention flow |
| 10 | Review for originality and policy risk | Safer final video |
| 11 | Export and publish | Finished video |
| 12 | Review performance | Production lessons |
Most creators only do steps 3, 8, and 11.
That is why the video feels generic.
Step 1: Confirm the Title, Thumbnail, and Hook Before Editing
Production starts before the first scene.
It starts with the viewer promise.
YouTube says viewers usually see the title and thumbnail first, and those elements help viewers decide whether to watch. YouTube also warns that misleading titles can cause viewers to stop watching, which can affect discoverability. Source: YouTube Help
That means the video must immediately match the package.
Before production, write this:
Title:
What the viewer clicked.
Thumbnail question:
What the thumbnail made them wonder.
Hook promise:
What the first 15 seconds must prove.
Video thesis:
What the video argues or explains.
Viewer expectation:
What the viewer expects to get by the end.
Example:
Title:
Why Your AI Faceless Videos Get No Views
Thumbnail question:
What is missing from this polished AI video workflow?
Hook promise:
The video usually fails before the first scene is rendered.
Video thesis:
The problem is not the AI video generator. The problem is skipping research, packaging, hook strategy, and originality.
Viewer expectation:
They want a clear diagnosis and a better workflow.
Now production has a job.
Every scene should support that job.
Step 2: Clean the Script for Production
A script that reads well is not always production-ready.
A production-ready script includes visual cues.
Weak script section:
Most creators start with a prompt, write a script, generate a voiceover, create visuals, and upload. But this workflow skips the research layer.
Better production-ready section:
Most creators start with a prompt.
Then a script.
Then a voiceover.
Then random visuals.
Then upload.
But the missing step is the one that decides whether the video deserved production in the first place: research.
Why the second version is better:
- The rhythm is clearer.
- Each line can become a visual beat.
- The editor knows where to change scenes.
- The voiceover has better pacing.
- Captions can emphasize the sequence.
- The final line gets a visual payoff.
Before voiceover, clean the script for:
- Sentence length
- Visual moments
- Section breaks
- Hook clarity
- Repetition
- Audio rhythm
- Hard-to-pronounce words
- Long lists
- Dead filler
- Scene changes
- Caption emphasis
A video script is not an article.
It needs to sound good and cut well.
Step 3: Create the Voiceover With Editing in Mind
The voiceover is the spine of the faceless video.
Everything else attaches to it.
A weak voiceover creates editing problems:
- Too fast
- Too flat
- Too robotic
- Too little pause
- No emotional shift
- No section separation
- No emphasis on key lines
- No room for visuals to breathe
A strong voiceover has:
- Clear pacing
- Intentional pauses
- Section rhythm
- Emotional control
- Strong opening delivery
- Emphasis on key claims
- Natural transitions
- Enough space for captions and visuals
Voiceover direction template
Use this before recording or generating the narration.
Tone:
Direct, premium, skeptical, documentary, practical, urgent, calm, cinematic, etc.
Audience:
Who the speaker is talking to.
Pacing:
Fast opening, medium explanation, slower for important lines.
Emotion:
Frustration, clarity, curiosity, warning, relief, confidence.
Do not sound like:
Generic AI explainer, corporate training, overhyped guru, robotic news reader.
Important lines to emphasize:
List 5 to 10 lines.
Pause moments:
Where the viewer needs time to understand.
Pronunciation notes:
Names, tools, acronyms, technical terms.
Example:
Tone:
Direct and skeptical.
Pacing:
Fast first 20 seconds, then controlled and clear.
Emotion:
The viewer should feel called out but helped.
Important line:
“The video was dead before the first AI scene was rendered.”
This gives the voiceover a performance direction.
Not just words.
Step 4: Break the Script Into Scenes
A scene is not every sentence.
A scene is a visual unit.
The mistake most AI video creators make is turning every line into a new image.
That creates visual chaos.
Instead, group the script into scenes based on meaning.
Scene types
| Scene Type | Purpose |
|---|---|
| Hook scene | Pays off title and thumbnail |
| Problem scene | Shows the viewer’s current pain |
| Diagnosis scene | Reveals the real issue |
| Framework scene | Explains the system |
| Example scene | Makes the idea concrete |
| Contrast scene | Shows weak vs strong |
| Proof scene | Adds credibility |
| Transition scene | Moves to the next section |
| Checklist scene | Makes the advice actionable |
| Product bridge scene | Shows how the workflow works |
| Final payoff scene | Leaves the viewer with a clear takeaway |
Example scene map
Video:
How to Turn a Script and Voiceover Into a Faceless Video
| Scene | Script Beat | Visual Intent |
|---|---|---|
| 1 | A script is not a video | Script page floating disconnected from timeline |
| 2 | Voiceover is not a video | Audio waveform with empty visual track |
| 3 | The handoff is where creators fail | Broken workflow between script, voiceover, scenes, export |
| 4 | Production needs direction | Director-style command center showing style, pacing, visuals |
| 5 | Confirm title and thumbnail | Title and thumbnail feeding the first scene |
| 6 | Clean script for production | Script lines splitting into scene blocks |
| 7 | Create voiceover with pacing | Voice waveform aligned with scene markers |
| 8 | Break into scenes | Timeline with grouped beats |
| 9 | Assign visual intent | Scene cards labeled by purpose |
| 10 | Add captions and motion | Captions highlighting key phrases |
| 11 | Quality control | Checklist scanning originality, pacing, audio, visuals |
| 12 | Final export | Completed faceless video ready to publish |
Now production is clear.
You are not generating random images.
You are building a visual argument.
Step 5: Assign Visual Intent to Every Scene
This is the key step.
Do not ask:
What image matches this sentence?
Ask:
What should the viewer understand or feel at this moment?
That is visual intent.
Examples:
| Script Line | Weak Visual | Strong Visual Intent |
|---|---|---|
| “Most creators skip research.” | Person typing on laptop | Show a production pipeline with the research layer missing |
| “The video was dead before production.” | Sad robot | Show a polished video stuck at low views before render starts |
| “A script is not a video.” | Script document | Show script disconnected from scenes, captions, music, and motion |
| “Packaging comes first.” | Thumbnail screenshot | Show title and thumbnail feeding the opening hook |
| “The workflow needs direction.” | Film camera | Show a director board controlling scene style and pacing |
Visual intent prevents generic footage.
A good visual is not just related to the words.
It makes the idea easier to understand.
Step 6: Choose a Consistent Visual Style
A faceless video needs visual consistency.
If every scene looks like it came from a different universe, the video feels cheap.
Choose a style before generating visuals.
Common faceless video styles:
| Style | Best For |
|---|---|
| Premium SaaS dashboard | AI, creator tools, business, workflows |
| Documentary editorial | tech, business, history, investigation |
| Cinematic explainer | history, science, geopolitics, deep dives |
| Minimal motion graphics | tutorials, education, software, strategy |
| Dark investigation board | mystery, breakdowns, business failures |
| Clean whiteboard system | beginner education, process videos |
| Futuristic interface | AI, software, automation, technology |
| Realistic stock + graphics | business, finance, productivity |
| Archival documentary | history, biography, company stories |
| 3D object metaphors | abstract topics, finance, tech, systems |
Style direction template
Visual world:
What universe does the video live in?
Lighting:
Dark premium, clean bright, cinematic, archival, natural.
Color mood:
Deep navy, grayscale, warm documentary, high-contrast red warnings, clean SaaS blue.
Primary visuals:
Dashboards, documents, timelines, objects, people silhouettes, maps, charts, interfaces.
Motion style:
Slow zooms, smooth pans, kinetic captions, sharp cuts, clean transitions.
Avoid:
Generic robots, random stock footage, cluttered AI art, fake unreadable UI, inconsistent characters, copied thumbnails.
Example:
Visual world:
Premium dark creator operating system.
Primary visuals:
Script pages, voice waveforms, timeline scenes, AI visual boards, thumbnail concepts, captions, export dashboard.
Motion style:
Clean zooms, scene cards sliding into timeline, waveform syncing to captions.
Now every scene can feel part of the same video.
Step 7: Create Scene Prompts or Shot Briefs
Once the scene map and style are clear, create scene prompts.
A weak prompt:
Create an AI image about YouTube automation.
A strong scene prompt:
Dark premium creator command center showing a script document and voiceover waveform disconnected from an empty video timeline. The scene should communicate that a script and voiceover are incomplete without visual direction. Cinematic lighting, deep navy interface, clean SaaS dashboard style, no readable text, no logos, no real YouTube UI, no faces.
The prompt includes:
- Scene purpose
- Main objects
- Emotional tone
- Style
- Composition
- Restrictions
Scene prompt template
Create a [style] scene that shows [main visual idea].

Purpose:
This scene should communicate [viewer understanding or emotion].

Main elements:
- [object 1]
- [object 2]
- [object 3]

Composition:
[how the frame should be arranged]

Mood:
[emotion]

Style:
[visual style]

Avoid:
[logos, copyrighted UI, clutter, real faces, copied thumbnails, unreadable text, etc.]
Use this for every important scene.
The more precise the intent, the less generic the output.
Step 8: Match Visual Rhythm to Voiceover Rhythm
A faceless video lives or dies by rhythm.
If the voiceover moves fast and visuals move slowly, the video feels disconnected.
If visuals change too often during a calm explanation, the video feels chaotic.
If visuals stay static during a high-stakes hook, the opening feels dead.
Match rhythm.
Rhythm guide
| Voiceover Moment | Visual Rhythm |
|---|---|
| Strong hook | Faster cuts, clear visual contrast |
| Important claim | Slow zoom or held frame |
| List of mistakes | Quick visual beats |
| Framework explanation | Stable layout, clean labels, step sequence |
| Example | Concrete visual scene |
| Emotional warning | Darker, slower, more dramatic |
| Practical checklist | Clean cards or step-by-step UI |
| Final takeaway | Simple strong visual, slower motion |
A good rule:
Change the visual when the viewer’s question changes.
Do not change the visual just because a sentence ended.
Step 9: Add Captions That Guide Attention
Captions are not only accessibility.
They are attention tools.
But bad captions can make a video feel cheap.
Weak captions:
- Every word on screen
- Huge blocks of text
- Random colors
- No emphasis
- Too fast
- Poor contrast
- Covering key visuals
- Mismatched timing
Strong captions:
- Highlight key phrases
- Reinforce structure
- Match voiceover timing
- Use clean hierarchy
- Avoid clutter
- Do not compete with the visual
- Support mobile viewing
- Emphasize emotional lines
Caption strategy
Use captions for:
- Key claims
- Step numbers
- Contrasts
- Definitions
- Lists
- Punch lines
- Framework names
- Final takeaway
Example:
Voiceover:
The mistake is not using AI. The mistake is using AI before the idea is proven.
Caption emphasis:
Not using AI.
Using AI before proof.
This makes the point land.
Step 10: Use Music to Support the Emotional Arc
Music should not be random background noise.
It should support the video’s emotional path.
Common mistake:
One generic track for the whole video.
Better:
- Hook: tension or urgency
- Diagnosis: focused, restrained
- Framework: clean, forward-moving
- Examples: subtle momentum
- Product workflow: confident and polished
- Final takeaway: calm resolution
Music should never fight the voiceover.
If viewers struggle to hear the narration, the mix is wrong.
Music checklist
- Is the voiceover clear?
- Does the music support the emotion?
- Does the track change or evolve?
- Are transitions smooth?
- Is the music too dramatic for the content?
- Is the music licensed or safe to use?
- Does the ending feel complete?
Do not let music make a practical video feel fake.
The emotion should match the promise.
Step 11: Add Motion With Purpose
Motion creates energy.
Too much motion creates noise.
Use motion to guide the viewer’s eye.
Good motion:
- Slow zoom into important object
- Timeline moving forward
- Scene card sliding into place
- Text appearing on emphasis
- Before-after reveal
- Highlight around key area
- Smooth transition between sections
- Subtle camera movement on static images
Bad motion:
- Constant zooms
- Random shakes
- Flashing transitions
- Movement with no meaning
- Overanimated captions
- Every scene treated the same
Motion should answer:
Where should the viewer look right now?
If it does not help, simplify it.
Step 12: Add Originality and Policy Checks
This step matters more than ever for AI-assisted faceless videos.
YouTube’s monetization policies say creators should publish original and authentic content. They also warn against AI-generated content made with generic templates that give the impression of mass production without original insights or perspective. Source: YouTube Help
That does not mean AI-assisted videos cannot work.
It means low-effort repetition is risky.
Before exporting, check:
- Does the video add original perspective?
- Are the visuals meaningfully connected to the script?
- Does the video avoid generic template repetition?
- Are the examples specific?
- Is the structure original enough?
- Are you using copyrighted clips, music, logos, or likenesses without permission?
- Are you making realistic synthetic scenes that need disclosure?
- Are you implying real people said or did things they did not?
- Are titles and thumbnails accurate?
- Is the video materially different from other videos on the channel?
AI disclosure check
YouTube says creators need to disclose realistic altered or synthetic content in certain cases, such as content that makes a real person appear to say or do something they did not do, alters footage of a real event or place, or generates a realistic-looking scene that did not actually occur. Source: YouTube Help
So ask:
- Does this video create a realistic person saying or doing something they did not do?
- Does it realistically alter footage of a real event?
- Does it show a realistic scene that did not happen?
- Is the topic sensitive, such as health, news, elections, or finance?
- Would a reasonable viewer think this footage is real?
If yes, follow YouTube’s disclosure rules.
For many abstract faceless videos using clearly stylized dashboards, motion graphics, illustrations, or non-realistic scenes, disclosure may not be required. But do not guess on sensitive content.
When in doubt, be transparent.
Step 13: Quality Control Before Export
Before exporting, watch the video like a viewer.
Not like the creator.
Use this checklist.
Packaging alignment
- Does the first 15 seconds pay off the title?
- Does the first 15 seconds pay off the thumbnail?
- Does the video deliver the promise?
- Is anything misleading?
Audio
- Voiceover is clear.
- Music is not too loud.
- No awkward pauses.
- No cut-off words.
- No robotic pronunciation issues.
- Audio levels are consistent.
Visuals
- Every scene supports the script.
- No random filler visuals.
- Style is consistent.
- Important visuals stay on screen long enough.
- No copyrighted or misleading assets.
- No fake real-world footage without disclosure.
Captions
- Captions are readable.
- Captions are timed correctly.
- Captions do not cover important visuals.
- Key phrases are emphasized.
- No spelling errors.
Pacing
- Hook moves fast enough.
- Framework sections are clear.
- No section drags.
- Visual changes match voiceover rhythm.
- Ending feels complete.
Originality
- Script has original insight.
- Visuals are not template-only.
- Structure is not copied.
- Thumbnail is not copied.
- The video feels materially different from other uploads.
If the video fails these checks, fix it before export.
Exporting a weak video faster is not a win.
The Script-to-Video Production Template
Use this for every faceless video.
Video Package
Working title:
Thumbnail concept:
Viewer:
Viewer promise:
Hook:
Video thesis:
Emotional arc:
Voiceover Direction
Tone:
Pacing:
Important lines:
Pause moments:
Pronunciation notes:
Energy level by section:
Scene Map
| Scene | Script Beat | Visual Intent | Visual Type | Caption Note | Motion Note |
|---|---|---|---|---|---|
| 1 | |||||
| 2 | |||||
| 3 |
Visual Style
Style:
Color mood:
Lighting:
Main visual objects:
Avoid:
Reference direction:
Production Notes
Music direction:
Caption style:
Motion style:
Transitions:
Quality control notes:
Disclosure or policy notes:
This turns a script and voiceover into a real production plan.
Example: Turning a Script and Voiceover Into a Faceless Video
Let’s use an example video:
ChatGPT Is Not Enough for YouTube Automation
Package
Title:
ChatGPT Is Not Enough for YouTube Automation
Thumbnail question:
What is missing between a prompt and a real YouTube channel system?
Thesis:
ChatGPT can help with writing, but YouTube automation needs a full workflow: research, packaging, scripting, voiceover, production, and review.
Viewer:
Creators using ChatGPT to make faceless YouTube videos but getting generic output.
Voiceover direction
Tone:
Direct, skeptical, practical.
Pacing:
Fast opening, controlled explanation, confident final workflow.
Important line:
“A prompt can create output. A system creates consistency.”
Scene map
| Scene | Script Beat | Visual Intent |
|---|---|---|
| 1 | ChatGPT can write a script | Show a prompt box creating a script document |
| 2 | But a script is not a channel | Show script floating disconnected from title, thumbnail, voiceover, video timeline |
| 3 | YouTube starts from behavior | Show public video signals, breakout videos, title patterns |
| 4 | Prompt-only content becomes generic | Show repeated generic videos stacking up with no differentiation |
| 5 | Workflow solves the gap | Show research → title → thumbnail → script → voiceover → production |
| 6 | OverseerOS connects the workflow | Show creator operating system dashboard concept |
| 7 | Final takeaway | Show finished video pipeline ready to publish |
Visual style
Dark premium creator command center.
No real YouTube logo.
No real ChatGPT logo.
No copyrighted thumbnails.
No creator faces.
Clean workflow dashboards, script documents, voice waveforms, timeline scenes, thumbnail concepts, and export panels.
Caption strategy
Emphasize:
- “A script is not a channel.”
- “Prompts create output.”
- “Systems create consistency.”
- “Research → packaging → script → voiceover → production.”
This is how a production brief prevents generic video output.
Why AI Video Generators Alone Usually Fail Here
AI video generators are useful.
But if you feed them a script with no direction, they often create:
- Generic visuals
- Random scene choices
- Inconsistent style
- Weak pacing
- Unclear transitions
- Bad metaphor choices
- Overliteral imagery
- Repetitive scenes
- Visuals that do not support retention
The problem is not the generator.
The problem is the missing production layer.
A good workflow tells the generator:
- What each scene should mean
- What style to maintain
- What emotion to support
- What not to include
- How visuals connect to the title
- Where the viewer needs clarity
- Where pacing should change
- How to avoid generic AI slop
AI is stronger when it has direction.
That is the whole point.
How OverseerOS Auto Edit Studio Fits This Workflow
OverseerOS Auto Edit Studio is designed to help creators turn scripts and voiceovers into structured faceless videos.
Use it after the idea, title, thumbnail, script, and voiceover are ready.
The workflow can help with:
- Turning scripts into scenes
- Matching visuals to narration
- Creating AI visual direction
- Supporting consistent video style
- Adding captions
- Adding music
- Adding motion
- Moving toward export
But the most important thing is where it sits in the system.
OverseerOS Auto Edit Studio should not be the first step.
It should come after:
- Demand research
- Channel analysis
- Viral video analysis
- Title direction
- Thumbnail concept
- Script brief
- Final script
- Voiceover
That is how production becomes stronger.
You are not asking Auto Edit to invent the whole strategy.
You are giving it a validated script and voiceover with a clear visual direction.
The Full OverseerOS Workflow From Research to Video
A serious faceless video workflow looks like this.
1. Find proven demand with OverseerOS Viral Channel Finder
Use OverseerOS Viral Channel Finder to find breakout channels and public performance patterns in your niche.
This helps you avoid producing videos from random ideas.
2. Analyze channels with OverseerOS Channel Analyzer
Use OverseerOS Channel Analyzer to study public channel signals, top videos, upload rhythm, title patterns, hook patterns, and strategic direction.
This helps you understand whether a channel is worth modeling.
3. Extract the blueprint with OverseerOS Channel Blueprint Cloner
Use OverseerOS Channel Blueprint Cloner to turn a public YouTube channel into a structured strategy blueprint with tone DNA, hooks, pacing, viral formulas, tags, keywords, and topic opportunities.
This gives your video a strategic foundation.
4. Break down specific winners with OverseerOS Viral X-Ray
Use OverseerOS Viral X-Ray to analyze specific YouTube videos, including public signals, title, thumbnail, hook, structure, tone, audience, emotions, and script strategy.
This helps you understand why a video worked.
5. Plan the video in OverseerOS Smart Content Planner
Use OverseerOS Smart Content Planner to organize the idea, title direction, thumbnail concept, script status, voiceover status, and production status.
This keeps the workflow connected.
6. Create title options with OverseerOS Viral Title Architect
Use OverseerOS Viral Title Architect to generate titles based on proven patterns, breakout videos, and planner context.
This helps you package before scripting.
7. Create the thumbnail with OverseerOS AI YouTube Thumbnail Generator
Use OverseerOS AI YouTube Thumbnail Generator to create original thumbnails from scratch, model visual DNA from a YouTube URL, clone from analyzed channels, or start from a 1M+ view thumbnail style library.
This helps make the video promise visual.
8. Write the script with OverseerOS Script Studio
Use OverseerOS Script Studio to turn the validated idea into a hook, outline, tone, retention structure, script, and voiceover direction.
This helps avoid generic script output.
9. Improve the script with OverseerOS Script ReSpark
Use OverseerOS Script ReSpark if the draft feels slow, vague, repetitive, or disconnected from the title-thumbnail promise.
This helps sharpen the video before voiceover.
10. Produce with OverseerOS Auto Edit Studio
Use OverseerOS Auto Edit Studio to move from final script and voiceover into scenes, visuals, captions, music, motion, style direction, and export.
This is the production bridge.
For the full tool map, explore the OverseerOS creator tools.
Manual Workflow vs OverseerOS Auto Edit Studio
You can do this manually.
But manual production gets messy.
| Task | Manual Workflow | OverseerOS Workflow |
|---|---|---|
| Break script into scenes | Spreadsheet or doc | Scene-based production workflow |
| Match visuals to narration | Manual prompting | Script-aware scene planning |
| Maintain style | Copy/paste prompts | Style direction across the project |
| Add captions | Separate editing tool | Caption workflow inside production |
| Add motion | Manual timeline edits | Structured motion direction |
| Add music | Separate licensing and editing | Production workflow planning |
| Manage revisions | Notes, comments, files | Connected creator workflow |
| Connect to strategy | Often lost | Planner, script, thumbnail, and production connected |
Manual can work.
But the connected workflow reduces the handoff problem.
And the handoff is where many faceless videos die.
The Most Common Script-to-Video Mistakes
Mistake 1: Generating one visual per sentence
This creates chaos.
Fix:
Group the script into meaningful scenes.
Mistake 2: Using generic visuals because they “match the keyword”
A line about “automation” does not need a robot.
A line about “strategy” does not need a chessboard.
Fix:
Use visual intent, not keyword matching.
Mistake 3: Ignoring the title and thumbnail
If the opening does not match the package, viewers leave.
Fix:
Start production from the title-thumbnail-hook promise.
Mistake 4: Making captions too busy
Captions should guide attention, not cover the video.
Fix:
Highlight key phrases instead of every word.
Mistake 5: Using one music track for every emotion
The music should support the arc.
Fix:
Match music to hook, framework, examples, and payoff.
Mistake 6: Letting AI visuals define the style
If every generated scene has a different look, the video feels cheap.
Fix:
Set a clear visual world before generating scenes.
Mistake 7: No originality check
AI-assisted faceless videos can become repetitive fast.
Fix:
Check for original perspective, varied substance, and non-template execution.
Mistake 8: Exporting before watching as a viewer
Creators often miss confusing pacing because they know the script too well.
Fix:
Watch the final draft cold and ask where a stranger would leave.
The Faceless Video Production Scorecard
Score the video before publishing.
| Factor | Question | Score |
|---|---|---|
| Package alignment | Does the opening pay off the title and thumbnail? | |
| Script clarity | Is the argument easy to follow? | |
| Voiceover quality | Is the narration clear and well-paced? | |
| Scene logic | Does every scene support the script? | |
| Visual consistency | Does the video feel like one style? | |
| Caption quality | Are captions readable and useful? | |
| Music mix | Does music support without overpowering? | |
| Motion | Does movement guide attention? | |
| Originality | Does the video add real perspective? | |
| Viewer payoff | Does the ending deliver the promise? |
Decision rule:
- 42 to 50: Ready to publish.
- 34 to 41: Good, but improve weak areas.
- 25 to 33: Needs revision before export.
- Below 25: Rebuild the production plan.
If a video scores badly, do not publish because it is “done.”
Done is not the goal.
Watchable is the goal.
The Final Export Checklist
Before publishing, confirm:
- Title is final.
- Thumbnail is final.
- Description is accurate.
- Script matches the video.
- Voiceover has no errors.
- Captions are readable.
- Music is licensed or safe.
- Visuals are consistent.
- No copyrighted assets are used improperly.
- AI disclosure rules were considered.
- The first 15 seconds match the package.
- The video has an original point of view.
- The ending includes a clear takeaway.
- The export settings match the platform.
- The file was reviewed after export.
Do not skip the post-export watch.
Some errors only appear in the final file.
What to Review After Publishing
After publishing, review:
- Impressions
- Click-through rate
- Average view duration
- First 30-second retention
- Audience retention dips
- Comments
- Subscriber gain
- Traffic source
- Thumbnail performance
- Search terms
- Suggested video sources
- Production effort versus result
Then ask:
- Did the title and thumbnail earn the click?
- Did the hook hold the viewer?
- Did visuals support the script?
- Did captions help or distract?
- Did the video feel too fast or too slow?
- Did viewers comment on clarity, pacing, or quality?
- Should this format become a series?
- What production rule should change next time?
Every video should improve the next video.
That is how a faceless production system gets better.
Example Production Review
Video:
Why Your AI Faceless Videos Get No Views
Result:
- Impressions: decent
- CTR: low
- Retention: strong after the first 45 seconds
- Comments: viewers liked the workflow but said the intro felt slow
Diagnosis:
- Topic was relevant.
- Script delivered value.
- Thumbnail or title may need sharper packaging.
- Hook needs faster stakes.
- Opening visuals may need clearer connection to low views.
Next production change:
- Show the failed video workflow immediately.
- Add low-view dashboard visual in first 5 seconds.
- Remove slow context.
- Use stronger caption emphasis on the main thesis.
Lesson:
The video’s value was strong, but the first 15 seconds did not pay off the package fast enough.
That is useful.
Now the next video improves.
The Best Script-to-Video Workflow for Beginners
Use this simple version.
- Finalize the title.
- Finalize the thumbnail concept.
- Rewrite the hook to match both.
- Clean the script for voiceover.
- Generate or record the voiceover.
- Break the script into 10 to 30 scenes.
- Assign visual intent to every scene.
- Choose one visual style.
- Generate or collect visuals.
- Add captions.
- Add music.
- Add motion.
- Review for pacing.
- Review for originality and policy risk.
- Export.
- Watch the exported file.
- Publish.
- Review data.
That is the workflow.
Not:
Script → voiceover → AI video generator → publish.
The second workflow is faster.
The first workflow creates better videos.
Final Verdict: Production Is the Bridge Between Strategy and Views
A script and voiceover are not enough.
They are important, but they are not the finished product.
A faceless video needs direction.
It needs scenes that support the argument.
It needs visuals that make ideas clear.
It needs captions that guide attention.
It needs music that supports emotion.
It needs motion that controls pacing.
It needs a thumbnail and title promise that the opening actually pays off.
It needs originality.
It needs quality control.
That is why the best workflow is not just script to video.
It is:
validated idea → title → thumbnail → hook → script → voiceover → scene map → visual direction → captions → music → motion → export → review.
If you want to do this manually, use the templates in this guide.
If you want the workflow connected, use OverseerOS Auto Edit Studio to turn scripts and voiceovers into structured faceless videos with scenes, AI visuals, captions, music, motion, style direction, and export workflows. Pair it with OverseerOS Viral Channel Finder, OverseerOS Channel Analyzer, OverseerOS Channel Blueprint Cloner, OverseerOS Viral X-Ray, OverseerOS Smart Content Planner, OverseerOS Viral Title Architect, OverseerOS Script Studio, and OverseerOS AI YouTube Thumbnail Generator so production starts from proof, not from a blank prompt.
The goal is not to make faceless videos faster.
The goal is to make faceless videos that feel directed.
That is what turns a script and voiceover into a real video.
FAQ
How do I turn a script and voiceover into a faceless YouTube video?
Start by confirming the title, thumbnail, hook, viewer promise, and video thesis. Then clean the script for production, create or finalize the voiceover, break the script into scenes, assign visual intent to each scene, choose a consistent visual style, add captions, music, motion, and transitions, then review for pacing, originality, and platform policy before exporting.
What is the best workflow for faceless video production?
The best workflow is research first, packaging second, scripting third, voiceover fourth, production fifth. Do not start with an AI video generator. Start with a validated idea, strong title, clear thumbnail concept, hook, script, voiceover, scene map, visual direction, captions, music, motion, and final quality control.
Can AI turn a script into a YouTube video?
Yes, AI tools can help turn a script into a video by generating scenes, visuals, captions, music, motion, and production assets. But AI works best when you provide a clear production brief, scene structure, visual style, and viewer promise. Without direction, the result often looks generic.
What do I need before using an AI video generator?
Before using an AI video generator, you need a validated topic, title, thumbnail concept, hook, script, voiceover, visual style direction, and scene map. If those are missing, the video may look polished but fail to deliver a clear viewer promise.
How many scenes should a faceless YouTube video have?
It depends on the length and pacing, but a faceless video should be broken into meaningful scenes, not one visual per sentence. A 6 to 10 minute video may have 20 to 60 visual moments, but those moments should be grouped around ideas, examples, transitions, and retention beats.
How do I make AI faceless videos look less generic?
Use visual intent instead of keyword matching. Define the video’s style, emotional arc, scene purpose, title-thumbnail promise, and originality angle before generating visuals. Avoid generic robots, random stock footage, copied thumbnails, and inconsistent AI images.
Should I create the voiceover before or after visuals?
Usually, create or finalize the voiceover before editing visuals because the voiceover controls timing and pacing. Visuals, captions, music, and motion should be built around the narration. However, the voiceover should be created after the title, thumbnail concept, hook, and script are clear.
Do AI-generated faceless videos need disclosure on YouTube?
YouTube requires disclosure for certain realistic altered or synthetic content, especially if it makes a real person appear to say or do something they did not do, alters footage of a real event or place, or generates a realistic scene that did not occur. Clearly stylized or non-realistic production may not require disclosure, but creators should follow YouTube’s current disclosure rules.
How does OverseerOS Auto Edit Studio help?
OverseerOS Auto Edit Studio helps creators turn scripts and voiceovers into structured faceless videos with scene planning, AI visuals, captions, music, motion, style direction, and export workflows. It is designed to connect production to the broader YouTube workflow instead of treating video generation as a disconnected final step.
What is the biggest mistake when turning scripts into faceless videos?
The biggest mistake is treating production as automatic assembly. A script and voiceover still need direction. Without scene planning, visual intent, pacing, captions, music, motion, quality control, and originality checks, the finished video can look polished but still feel generic and fail to hold viewers.