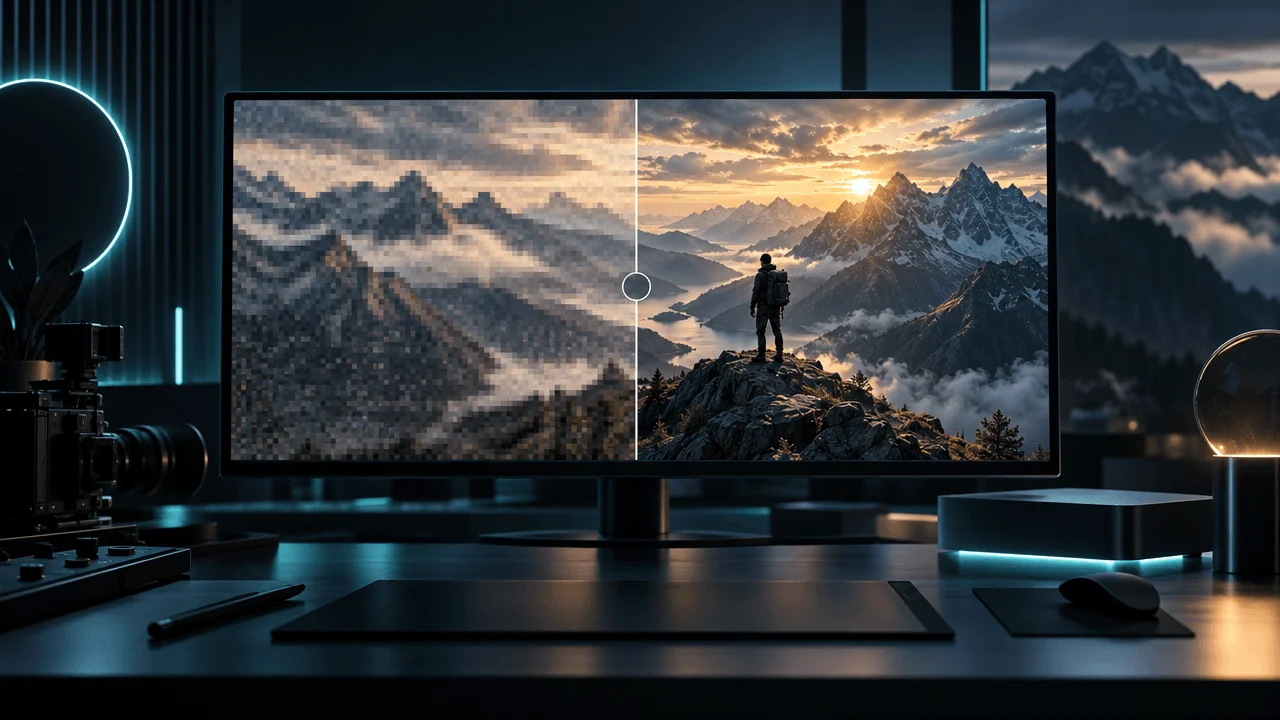

Why Do YouTube Videos Look Blurry After Upload? 7 Fixes That Actually Work
You finish editing your YouTube video, export it in 1080p, and upload it.
Then you open YouTube.
Something looks wrong.
The video that looked sharp on your computer now appears blurry, pixelated, or noticeably lower quality. Small details have disappeared, text looks softer, and moving objects seem less clear.
So you export it again.
You increase the bitrate, try another format, and upload a second version. But the result barely improves.
Sound familiar?
The problem is that video quality can deteriorate at several different stages of production. Your original footage might be low resolution, your editing software might compress the export too aggressively, or YouTube might still be processing the higher-quality versions.
These problems require different solutions.
In this guide, we'll explain why YouTube videos look blurry after uploading, how to identify the actual cause, and seven practical ways to improve your video quality.
We'll also explain why exporting in Full HD matters and how to avoid unnecessary quality loss when producing videos regularly.
Quick Answer: Why Do YouTube Videos Look Blurry After Upload?
YouTube videos can look blurry after uploading for seven main reasons:
- The original footage has insufficient resolution.
- The editing software exports the video with excessive compression.
- The video bitrate is too low.
- YouTube has not finished processing its higher-quality versions.
- The export resolution does not match the intended video format.
- The frame rate or encoding settings are inappropriate.
- The original images or generated visuals already contain insufficient detail.
The first thing to understand is that YouTube does not necessarily make every video blurry.
Sometimes the problem exists before the upload. In other cases, the platform has simply not finished processing the higher-resolution versions.
The correct fix depends on where the quality loss happens.
1. YouTube Hasn't Finished Processing Your Video in HD
One of the most common reasons a newly uploaded video appears blurry.When you upload a video to YouTube, it initially becomes available in lower quality.
Higher-resolution versions, including 1080p and 4K, can take longer to process.
This means your video might be available to watch even though its highest-quality versions are not ready.
For example:
You upload a 15-minute video in 1080p.
A few minutes later, you open it and notice that only lower-resolution playback options are available.
You might assume something went wrong with your export.
But the video could simply still be processing.
YouTube explains that higher-quality processing can take several hours depending on factors such as:
- Video resolution.
- Video length.
- Frame rate.
- Encoding quality.
- Traffic and processing demand.
Source: YouTube Help: Low Video Quality After Upload.
How to Fix It
Before exporting your video again:
- Open the uploaded video's watch page.
- Select the settings icon in the video player.
- Open the Quality menu.
- Check whether 1080p or your intended resolution is available.
- If it is missing, allow additional processing time.
You can also upload your video as unlisted first and make it public after the higher-quality versions become available.
This is particularly useful when you have a scheduled publication time and want to avoid viewers seeing the lower-quality version first.
Important: Do not re-export a perfectly good video simply because YouTube has not finished processing it.
2. Your Export Bitrate Is Too Low
Bitrate is one of the most important factors affecting video quality.
It describes how much data is used to represent the video over time.
When the bitrate is too low, the encoder has less information available to preserve fine details.
This can produce:
- Blurry textures.
- Pixelated movement.
- Blocky backgrounds.
- Poor-looking text.
- Smearing during fast motion.
- Loss of detail in complex scenes.
The problem becomes especially noticeable in videos containing detailed backgrounds, fast camera movements, animation, or generated visuals.
What Bitrate Should You Use for YouTube?
YouTube publishes recommended upload bitrates for SDR video.
Its recommendations include:
| Resolution | Standard Frame Rate (24–30 FPS) | High Frame Rate (48–60 FPS) |
|---|---|---|
| 720p | 5 Mbps | 7.5 Mbps |
| 1080p | 8 Mbps | 12 Mbps |
| 1440p | 16 Mbps | 24 Mbps |
| 2160p (4K) | 35–45 Mbps | 53–68 Mbps |
These are YouTube's recommended SDR upload bitrates, not universal minimum requirements.
HDR uploads have different recommendations.
Source: YouTube Recommended Upload Encoding Settings.
How to Fix It
When exporting your video:
- Select the correct resolution.
- Choose an appropriate bitrate.
- Avoid unnecessarily aggressive compression.
- Export a short sample if you're unsure.
- Inspect the exported file before uploading.
If your editing application offers a quality slider instead of a bitrate field, choose a high-quality setting and verify the resulting file.
Increasing bitrate indefinitely is not the solution.
Once the source quality and encoding are already good, additional bitrate produces diminishing returns.
3. You're Exporting in 720p Instead of 1080p
This sounds obvious, but it happens more frequently than creators realize.
You might edit a video in a project that looks sharp inside the editor, only to discover that the final export is 720p.
Your original images might be high resolution, but the exported video has already lost detail.
The difference between 720p and 1080p is significant.
**720p HD** 921,600 Pixels per frame 1280 × 720 **1080p Full HD** 2,073,600 Pixels per frame 1920 × 10801080p contains 2.25 times as many pixels as 720p.
That provides considerably more room for detail.
How to Fix It
Before exporting, verify:
- Project resolution.
- Export resolution.
- Aspect ratio.
- Output dimensions.
For standard horizontal YouTube videos, 1920 × 1080 is a common Full HD target.
For vertical Shorts, 1080 × 1920 is a common Full HD target.
Do not assume that selecting a high-resolution project automatically means the final export uses that resolution.
Always check the exported file.
4. Your Original Images and Footage Are Already Low Quality
This is particularly important for faceless YouTube channels.
Many creators produce videos using:
- AI-generated images.
- Stock footage.
- Screenshots.
- Illustrations.
- Animated still images.
- Screen recordings.
These assets might look good individually, but their resolution and quality can vary considerably.
Imagine building a 1080p documentary using a combination of high-resolution images and small, compressed images downloaded from websites.
The low-resolution images may become visibly blurry when stretched across the entire video.
Exporting the finished video in 1080p will not magically restore the missing detail.
How to Fix It
Check the source assets before adding them to your timeline.
For images:
- Use sufficiently high-resolution originals.
- Avoid repeatedly saving compressed versions.
- Avoid excessive enlargement.
- Use suitable image formats.
- Generate new assets when the original resolution is insufficient.
For video footage:
- Prefer original recordings or high-quality source files.
- Avoid repeatedly transcoding the same footage.
- Check whether the footage is genuinely 1080p or simply an upscaled lower-resolution file.
For AI-generated visuals:
- Generate images at an appropriate resolution.
- Avoid excessive cropping.
- Review fine details before using the image.
- Check whether animation introduces additional visual artifacts.
The key principle is simple:
A Full HD export cannot contain more genuine visual detail than the source material provides.
5. YouTube Compression Is Reducing the Quality of Your Video
Every video uploaded to YouTube is processed into streaming formats.
This allows the platform to deliver different quality levels across devices, connections, and playback conditions.
However, the processing can change how your video looks compared with the original exported file.
This is especially noticeable in:
- Fast-moving footage.
- Detailed textures.
- Dark scenes.
- Gradients.
- Fine text.
- Complex animation.
You might notice that the local export looks sharper than the version playing on YouTube.
This does not automatically mean your original export was defective.
How to Reduce Quality Loss
You cannot completely control YouTube's processing.
However, you can give the platform a better-quality source.
Use:
- Appropriate resolution.
- Sufficient bitrate.
- H.264 encoding where suitable.
- Progressive video.
- An appropriate frame rate.
- Consistent source dimensions.
- Correct color-space settings.
For standard SDR video, YouTube recommends BT.709 color space.
Its recommended upload settings also specify H.264, progressive scan, and other encoding parameters.
Source: YouTube Recommended Upload Encoding Settings.
Do not confuse a larger file with a guaranteed better result.
The goal is a properly encoded source, not the largest possible export.
6. Your Frame Rate and Export Settings Don't Match the Source
Frame rate affects how smoothly motion appears.
Common YouTube frame rates include:
- 24 FPS.
- 25 FPS.
- 30 FPS.
- 48 FPS.
- 50 FPS.
- 60 FPS.
YouTube recommends uploading content using the same frame rate in which it was recorded.
For example, if your original footage was recorded at 30 FPS, exporting at 60 FPS does not automatically create more genuine motion detail.
It may simply increase file size or introduce duplicated or interpolated frames, depending on the export process.
How to Fix It
Check the source frame rate before exporting.
Use the same frame rate unless you have a specific reason to change it.
Also check:
- Progressive versus interlaced output.
- Video codec.
- Audio codec.
- Color space.
- Export dimensions.
YouTube's upload troubleshooting documentation provides additional guidance for resolving video and audio problems.
Source: Troubleshoot Audio or Video Issues With Uploads.
7. You're Judging the Video Before Checking Its Actual Playback Quality
There is another common mistake.
Creators upload a video, open it immediately, and judge its quality without checking the playback settings.
But YouTube may initially serve a lower-resolution version.
Your browser or device may also automatically select a lower playback quality depending on connection conditions and settings.
This creates a misleading comparison.
How to Fix It
Use a consistent testing process.
- Open the video on YouTube.
- Wait until high-resolution processing is complete.
- Open the player settings.
- Select the highest available quality.
- Compare it with your original exported file.
- Test on another browser or device if the difference remains.
If the local export is sharp but the YouTube version remains noticeably worse after processing, investigate the encoding and source quality.
Do not assume that every blurry upload needs to be rendered again.
Recommended YouTube Export Settings for 1080p Videos
Here is a practical starting point for creators exporting standard SDR videos.
| Setting | Recommended Starting Point |
|---|---|
| Resolution | 1920 × 1080 |
| Video codec | H.264 |
| Container | MP4 |
| Frame rate | Match source |
| Scan type | Progressive |
| Bitrate at 24–30 FPS | 8 Mbps |
| Bitrate at 48–60 FPS | 12 Mbps |
| Color space | BT.709 |
| Audio codec | AAC-LC |
| Audio sample rate | 48 kHz |
These settings are based on YouTube's published recommendations for SDR uploads.
They are a practical starting point, not a guarantee that every source will look identical after YouTube processing.
For 4K, HDR, and other formats, consult the official encoding recommendations.
Why Full HD Export Matters for Faceless YouTube Channels
Faceless YouTube channels often rely heavily on visual assets.
A typical video might contain:
- AI-generated images.
- Stock footage.
- Animated scenes.
- Maps.
- Charts.
- Screenshots.
- Captions.
- Motion graphics.
When these elements are combined, export quality becomes particularly important.
A blurry export can undermine otherwise good visual work.
Small text becomes harder to read. Fine details disappear. Images lose clarity. Motion can look less polished.
This matters even more for documentary and educational content, where viewers need to understand what they are seeing.
The export should preserve as much of the source quality as reasonably possible.
But there is another issue creators need to consider.
Producing multiple videos every week means export quality must be consistent across the entire production workflow.
You should not have to manually investigate the resolution and encoding settings of every single video.
How OverseerOS Auto Edit Helps You Export YouTube Videos in Full HD
If you produce videos regularly, export quality should be part of your production system.
OverseerOS Auto Edit supports Full HD video exports as part of its automated video-production workflow.
Instead of treating export as an unrelated final task, it is integrated into the process of turning ideas, scripts, and visual scenes into completed videos.
Full HD Export
OverseerOS Auto Edit supports Full HD exports for creators who need higher-resolution finished videos.
This is particularly useful for:
- Faceless YouTube channels.
- Educational videos.
- Documentary production.
- Narration-led videos.
- Long-form content.
- Creators managing multiple video projects.
Integrated Production
OverseerOS Auto Edit also combines scene-based editing with visual styles, camera movement presets, animated text pop-ups, and export functionality.
That means creators can manage more of their production workflow inside one system.
When Full HD Is Not Enough
It is important to understand what Full HD export does and does not solve.
It provides an appropriate output resolution.
It does not automatically:
- Restore detail missing from low-resolution source images.
- Remove compression artifacts already present in footage.
- Fix incorrectly generated images.
- Guarantee YouTube will immediately offer 1080p playback.
- Turn a low-quality source into genuine high-resolution footage.
You still need good source assets and appropriate production settings.
The advantage is having Full HD export integrated into your existing video-production workflow rather than having to assemble and manage every stage manually.
How to Check Whether Your YouTube Video Is Actually 1080p
If you want to verify the final result, follow these steps.
Step 1: Check the Original Export
Find the exported file on your computer.
On Windows, right-click the file and inspect its properties.
On macOS, open the file in QuickTime Player and inspect the movie information.
Look for:
- Width.
- Height.
- Frame rate.
- File format.
For a standard Full HD horizontal video, you should see 1920 × 1080.
Step 2: Upload the Video
Upload the video through YouTube Studio.
You can initially set its visibility to unlisted if you want to review it before publication.
Step 3: Wait for HD Processing
Allow YouTube to finish processing the higher-quality versions.
Longer and higher-resolution videos can take more time.
Step 4: Check Playback Quality
Open the video and select Settings → Quality.
Confirm that 1080p is available.
Step 5: Compare the Two Versions
Compare the original export with the YouTube playback version at the same resolution.
Look for:
- Text sharpness.
- Fine details.
- Motion artifacts.
- Image clarity.
- Color differences.
If the original is already blurry, the problem exists before YouTube processing.
If the original is sharp but the YouTube version is not, investigate playback quality and encoding.
This simple comparison can prevent hours of unnecessary re-exporting.
Frequently Asked Questions
Why does my YouTube video look blurry even though I uploaded it in 1080p?
YouTube may still be processing its higher-resolution versions. Other possible causes include low source quality, insufficient export bitrate, aggressive compression, or playback at a lower resolution. Check the available playback quality before exporting again.
How long does YouTube take to process a 1080p video?
There is no fixed processing time. It depends on video length, resolution, frame rate, format, and processing demand. Higher-quality versions can take several hours to become available.
What bitrate should I use for 1080p YouTube videos?
YouTube recommends 8 Mbps for standard-frame-rate SDR 1080p uploads at 24–30 FPS and 12 Mbps for high-frame-rate uploads at 48–60 FPS.
Is 1080p enough for YouTube?
For most standard YouTube videos, 1080p Full HD is a practical delivery resolution. Higher resolutions can be useful when your source material and production workflow support them, but 4K is not automatically necessary for every channel.
Does uploading in 4K make a 1080p video look better?
Not automatically. Upscaling a 1080p source to 4K does not create genuine missing detail. It can sometimes change how YouTube processes the video, but it should not be treated as a guaranteed quality improvement.
Why does my YouTube video look worse on mobile?
YouTube may select a lower playback quality depending on connection conditions, device settings, and playback preferences. Check the Quality setting manually and compare the video on another device.
Does YouTube compress every uploaded video?
YouTube processes uploaded videos into formats suitable for streaming across different devices and playback conditions. This processing can affect the appearance of the final playback compared with the original file.
Should I export YouTube videos in MP4 or MOV?
MP4 with H.264 video encoding is a common and practical choice for YouTube uploads. YouTube also supports other formats. Follow its current upload recommendations and use a format supported by your editing software.
Can I improve a blurry video after uploading it to YouTube?
If the problem is incomplete HD processing, you may only need to wait. If the original file is low quality, you may need to improve the source footage or regenerate the affected assets. Re-exporting a low-quality source at a higher resolution will not automatically restore missing detail.
Does higher bitrate always mean better YouTube video quality?
No. Higher bitrate can preserve more detail when the original video contains sufficient information, but improvements eventually become marginal. Source quality, encoding, resolution, and YouTube processing all matter.
Why does my 1080p video look pixelated during movement?
Fast-moving footage can be difficult to compress. Insufficient bitrate can cause blockiness and motion artifacts. Use an appropriate bitrate and avoid excessively aggressive compression.
Can OverseerOS Auto Edit export videos in Full HD?
Yes. OverseerOS Auto Edit supports Full HD exports as part of its automated video-production workflow. The quality of the final result still depends on the original assets and the production process.
Final Verdict: Fix the Actual Quality Problem Before Exporting Again
If your YouTube videos look blurry after uploading, don't immediately assume that you need a better editing application or a higher-resolution export.
First, identify where the quality loss happens.
Check the original assets.
Verify your export resolution.
Use an appropriate bitrate.
Make sure the frame rate and encoding settings are suitable.
Allow YouTube to finish processing its higher-quality versions.
Then compare the original export with the actual YouTube playback.
These steps will help you distinguish between source-quality problems, export problems, and YouTube processing delays.
For creators producing videos regularly, having a reliable Full HD export workflow also matters.
OverseerOS Auto Edit integrates Full HD export into an automated video-production system, helping creators manage scenes, visual treatments, editing, and finished videos in one workflow.
You shouldn't spend hours producing great visuals only to lose unnecessary detail during the final export.
Create with quality in mind. Export with the right settings. And make sure the finished video looks as good as the work that went into it.
Sources and Further Reading
- YouTube Recommended Upload Encoding Settings - Official recommendations for video codecs, resolutions, frame rates, bitrates, and color space.
- YouTube: Low Video Quality After Upload - Explanation of how higher-resolution video processing works and why HD versions may take longer to appear.
- YouTube: Troubleshoot Audio or Video Issues With Uploads - Official troubleshooting guidance for upload quality and encoding problems.
- OverseerOS Auto Edit - Automated YouTube video production and Full HD export.
Methodology
This guide uses YouTube's official upload and processing documentation as its technical reference.
The recommended encoding settings are taken from YouTube's published SDR recommendations. Actual playback quality can vary depending on source material, encoding, processing, and viewing conditions.
Product capabilities are described separately from YouTube's own processing behavior. OverseerOS Auto Edit supports Full HD export, but it does not control YouTube's subsequent transcoding or guarantee identical playback quality across devices.